bikesport.biz.id – Hey there, fellow cyclists! So, you love hitting the road, but maybe not so much after the sun goes down? That’s totally understandable. Riding at night can be a bit… well, darker and sometimes scarier. But what if I told you there’s a way to boost your confidence and safety significantly? We’re talking about bike cameras, specifically the best bike cameras for night riding safety. These little gadgets can be your eyes and ears when visibility is low, and honestly, they’re becoming a must-have for any serious cyclist.
We’re going to dive deep into what makes a bike camera great for nighttime adventures. It’s not just about recording your epic rides; it’s about capturing crucial evidence if something unexpected happens. We’ll explore the key features you should look for, compare some top contenders, and help you figure out which one is the perfect fit for your needs. Let’s get those wheels rolling into the dark with confidence!
Why You Need a Bike Camera for Night Riding
Riding in the dark presents a unique set of challenges. Other road users might not see you as easily, and you might not see potential hazards until it’s too late. A good bike camera acts as an extra set of eyes, providing valuable footage of your surroundings. This footage isn’t just for fun memories; it’s a critical safety tool.
Think about it: if an accident occurs, having clear video evidence can be invaluable. It can help identify fault, protect you from false claims, and even help police investigate incidents. Plus, knowing you’re being recorded can make you feel more secure and encourage more cautious behavior from others.
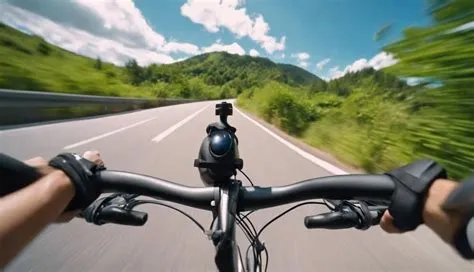
Key Features to Look for in Night Riding Bike Cameras
When you’re shopping for a bike camera, especially for low-light conditions, there are a few things that really matter. It’s not a one-size-fits-all situation, so understanding these features will help you make the best choice.
Low-Light Performance and Image Quality
This is probably the most important factor for night riding. You need a camera that can capture clear, detailed footage even when there’s very little light. Look for cameras with high-quality sensors and lenses designed for low-light situations. Features like a wide aperture (lower f-number) and advanced image processing are your friends here.
Don’t just rely on megapixels; they don’t tell the whole story. What you really want is good low-light sensitivity, often indicated by a higher ISO capability (though too high can introduce noise). Also, check for features like night vision or specific low-light modes, if available.
Field of View (FOV)
A wide field of view is crucial for capturing as much of your surroundings as possible. This helps you see what’s happening to your sides and behind you, not just directly in front. For night riding, a wider FOV can help you spot approaching headlights or potential hazards lurking in the shadows.
Most cameras will list their FOV in degrees. Aim for something around 120-170 degrees for a good balance of coverage without too much distortion. Too narrow, and you miss things; too wide, and the image can look warped.
Durability and Weather Resistance
Let’s face it, cycling can be rough, and the weather isn’t always kind. Your bike camera needs to be able to withstand bumps, vibrations, and the elements. Look for cameras with a high IP rating (Ingress Protection) for water and dust resistance. An IP67 or IP68 rating is generally excellent.
Beyond water resistance, consider how robust the camera’s casing is. Does it feel solid? Can it handle accidental drops or impacts? You don’t want your safety equipment failing just because of a bit of rain or a bumpy road.
Battery Life
Long rides require long battery life. If your camera dies halfway through your journey, it’s useless when you need it most. Check the manufacturer’s stated battery life and consider if it meets your typical riding duration. Many cameras offer the option to connect to external power banks for extended recording.
Some cameras also have excellent power-saving modes or the ability to record while charging, which can be a lifesaver on longer excursions. Always consider how you’ll power the device for extended use.
Ease of Use and Mounting
You don’t want to be fumbling with complicated buttons or mounts while you’re trying to ride. The best bike cameras are intuitive to operate and come with secure, easy-to-use mounting solutions. Ideally, you want a camera that’s simple to turn on, off, and start recording with minimal fuss.
Look for versatile mounting options that allow you to position the camera effectively on your handlebars, helmet, or seatpost. A secure mount is non-negotiable; you don’t want your camera bouncing around or falling off.
Top Bike Cameras for Night Riding: A Closer Look
Now that we know what to look for, let’s explore some of the leading contenders in the market. While specific models change, we’ll focus on brands and types that consistently perform well in low-light conditions.
Brand A: The All-Rounder
Brand A often gets high marks for its balanced features. Their cameras typically offer excellent image quality, even in challenging lighting. Many models boast impressive wide-angle lenses and robust build quality, making them suitable for all conditions.
Their low-light performance is often praised for producing clear, relatively noise-free footage. Battery life is usually decent, and they come with a range of mounting accessories. This brand is a solid choice if you want a reliable camera that excels in various scenarios, including nighttime riding.
Brand B: The Night Vision Specialist
If your primary concern is capturing clear video in near-total darkness, Brand B might be your go-to. They often incorporate advanced sensors and processing specifically designed for low-light environments. Some models even feature specialized ‘night mode’ settings that can dramatically improve visibility.
While their daytime footage might be on par with others, their standout feature is undoubtedly their superior performance after sunset. Battery life and durability are usually good, but always check the specifics for the model you’re interested in.
Brand C: The Budget-Friendly Option
Not everyone has a king’s ransom to spend on bike tech. Brand C often provides a more affordable entry point into the world of bike cameras. While they might not match the absolute top-tier performance of more expensive options, they can still offer significant safety benefits for night riders.
You might find slightly less sophisticated sensors or fewer advanced features, but many Brand C cameras still provide decent footage and reliable recording. It’s about finding the best value for your money, and sometimes a capable budget camera is all you need.
Comparison Table (Hypothetical Example)
To make things even clearer, let’s imagine a quick comparison. Remember, actual specs can vary by model!
| Feature | Brand A (All-Rounder) | Brand B (Night Vision Specialist) | Brand C (Budget-Friendly) |
|---|---|---|---|
| Low-Light Performance | Very Good | Excellent | Good |
| Field of View | 150 degrees | 135 degrees | 120 degrees |
| Durability/IP Rating | IP67 | IP65 | IP54 |
| Battery Life (est.) | 3 hours | 2.5 hours | 2 hours |
| Price Range | $$$ | $$$ | $ |
This table gives you a general idea. Always do your own research on specific models and read recent reviews before making a purchase!
Tips for Maximizing Your Night Riding Camera’s Effectiveness
Once you’ve got your camera, there are a few tricks to get the most out of it, especially when the sun goes down.
Proper Mounting and Positioning
The best camera in the world won’t help if it’s pointed at the sky or the ground. Ensure your camera is mounted securely and positioned to capture the most relevant footage. For safety, you’ll want to capture what’s happening in front and, if possible, to the sides. Some riders opt for a front-facing and a rear-facing camera for complete coverage.
Consider the angle. You want to see the road ahead clearly, but also any approaching vehicles or potential dangers. Experiment with different angles during a test ride in daylight to find what works best for your setup.
Utilizing Night Mode or Settings
If your camera has a specific night mode or advanced low-light settings, make sure you know how to use them. These settings are often optimized to reduce noise and enhance detail in dark conditions. Don’t be afraid to play around with the camera’s settings before you head out on a night ride.
Some cameras might allow you to adjust exposure or contrast manually, which can be very helpful. Reading the manual is often a good first step to understanding all the capabilities of your new gadget.
Keeping the Lens Clean
This might sound obvious, but a dirty lens is a major culprit for poor image quality, day or night. Dust, mud, and water droplets can obscure your view. Make it a habit to wipe your camera lens before every ride, especially if you’ve been through puddles or dusty paths.
Carry a small microfiber cloth with you. It’s a simple step that makes a huge difference in the clarity of your footage. A clean lens means clearer evidence and better visibility.
The Best Bike Cameras for Night Riding: Final Thoughts
Investing in a good bike camera for night riding is an investment in your safety. It’s about having peace of mind and being prepared for anything the road might throw at you. While the ‘best’ camera is subjective and depends on your budget and specific needs, prioritizing low-light performance, durability, and battery life will set you on the right path.
Don’t let darkness deter you from enjoying your cycling. With the right gear, you can ride with confidence, knowing you’re well-equipped and well-recorded. Stay safe out there, and happy riding!